Using WorkXFlow Planner with XPM
It’s as simple as 1 – 2 – 3
Once you are registered with WorkXFlow Planner and logged in, WorkXFlow has a very simple 3 step procedure.
Connect to PM software
1
Down sync data to WorkXFlow
2
Visual planning of works
3
Up sync to PM software
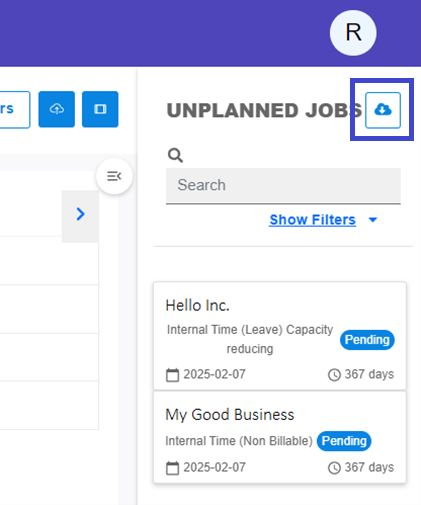
Step 1 - Downsynch from XERO Practice Manager
The downsynch will synchronize the most recent Job, Task, Staff and Client data from XERO Practice Manager
- To downsynch, click the downsynch icon in the top right corner of the unplanned queue.
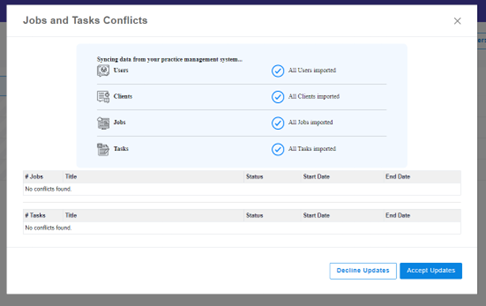
- WorkXFlow Planner will begin down synching data from XERO Practice Manager and perform a conflict check against any changes in XERO against previously planned work.
- Once the conflict check is completed, click the Accept updates button to get the latest information from XERO, or you can click the Decline updates to continue with the data currently in WorkXFlow Planner.
NOTE – It is recommended to accept the updates to ensure synchronized data for planning.
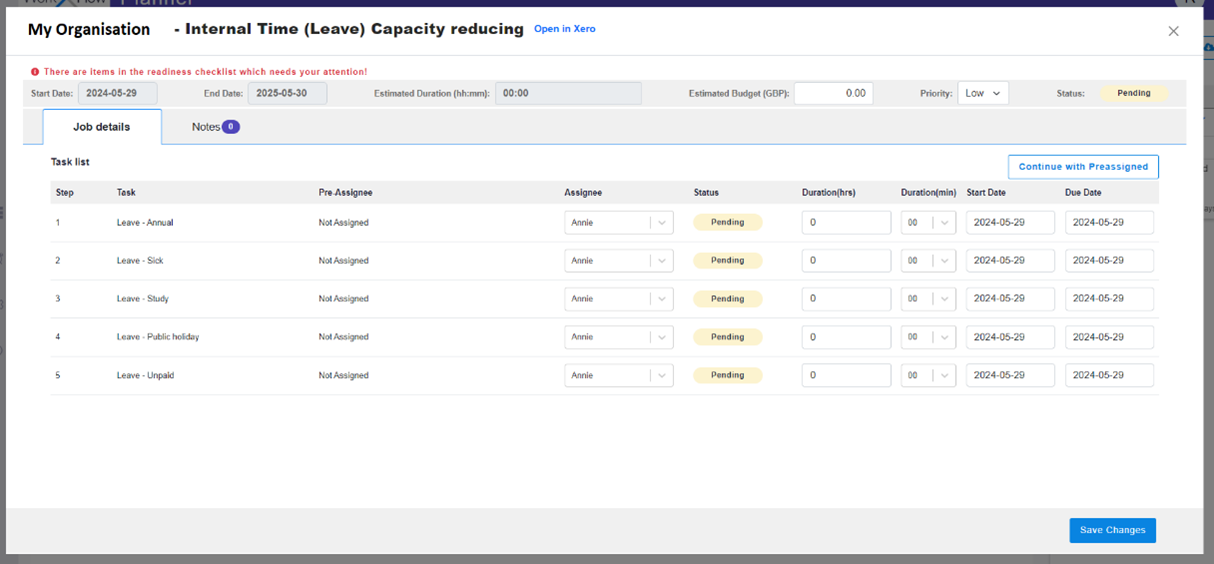
Step 2 - Plan your work
- Drag and drop tickets from the Unplanned Queue to the calendar grid to the date and assignee you require.
- Select the assignees, durations, start and end dates for each task and click the Save changes button.
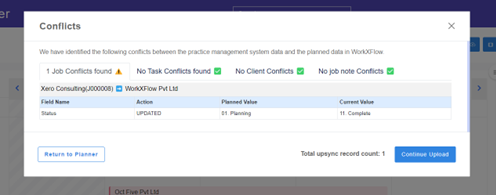
Step 3 - Upsynch your plan to XERO Practice Manager
- Once you have finished planning your jobs, click the Upsynch icon
- WorkXFlow Planner will begin upsynching the planned data to XERO Practice Manager and perform a conflict check against any changes in XERO against previously planned work.
- Once the conflict check is completed, click the Continue Upload button, or you can click the Return to Planner button to re-plan any conflicting jobs or tasks.